7 tips on how to create perfect sunstars in your Landscape Photography
Creating sunstars in landscape photography is a great way to add a dramatic and artistic effect to your images. I personally love including them when the scene suits it, you'll find I'll often include them in my images. At its most basic, creating a sunstar requires you to shoot towards the sun, ideally at a narrow aperture like f/16-f/22, but there's more to learn to achieve success with this technique, here are seven simple tips to follow for successful sunstars!
1. The number of aperture blades on a lens creates different sunstars
Not all lenses are created equal when it comes to sunstars. In general the more aperture blades your lens has, the greater the number of spikes or lines your sunstar will have and therefore the better definition your sunstars will have. An even number of aperture blades creates the same number of spikes, whereas an uneven number will create double the number of spikes. Why is this? Well, lenses with an even number of aperture blades have a fully symmetrical design, which means that half of the sunbeams will overlap the other half, so you don’t see all of them in your final photo. You can look up the specifications of your lenses online to find out how many aperture blades your lens has to understand how your sunstars will look.

Sony a7R IV + 16-35mm f2.8 GM @ 25mm, 1/100 sec | f/10 | ISO200
2. Choose a narrow aperture between f/16-f/22 for the best definition
In order to create a very defined sunstar, you need to make the aperture hole as small as possible so that the light has to bend around the aperture blades to get the effect. You can still create sunstars at wider apertures, but they will look a lot more diffused and less defined.

Whilst the narrowest apertures will give you the best sunstar, there is a trade off with the overall sharpness of your image. Shooting with a narrow aperture introduces diffraction (due to the light waves having to bend more) which means your image won't be as sharp as if you were to shoot it at f/11. I am happy to accept this compromise on occasions when I'm deliberately trying to capture a sunstar, but it is generally the only time I allow my aperture to go beyond f/16.
It is also possible to shoot a sunstar when the sun is directly overhead in the sky, but you may find that you have flare to deal with, below are two examples of this. In particular, the second image shows green and purple flare in the rocks as well as some flaring in the sky. You can also contrast how different the look of the sunstars is with these two different lenses, the top image shot on a lens with 11 aperture blades and the bottom image with 7 aperture blades.

Sony a7R II + 16-35mm f2.8 GM @ 16mm (11 aperture blades), 1/500 sec| f/14 | ISO100
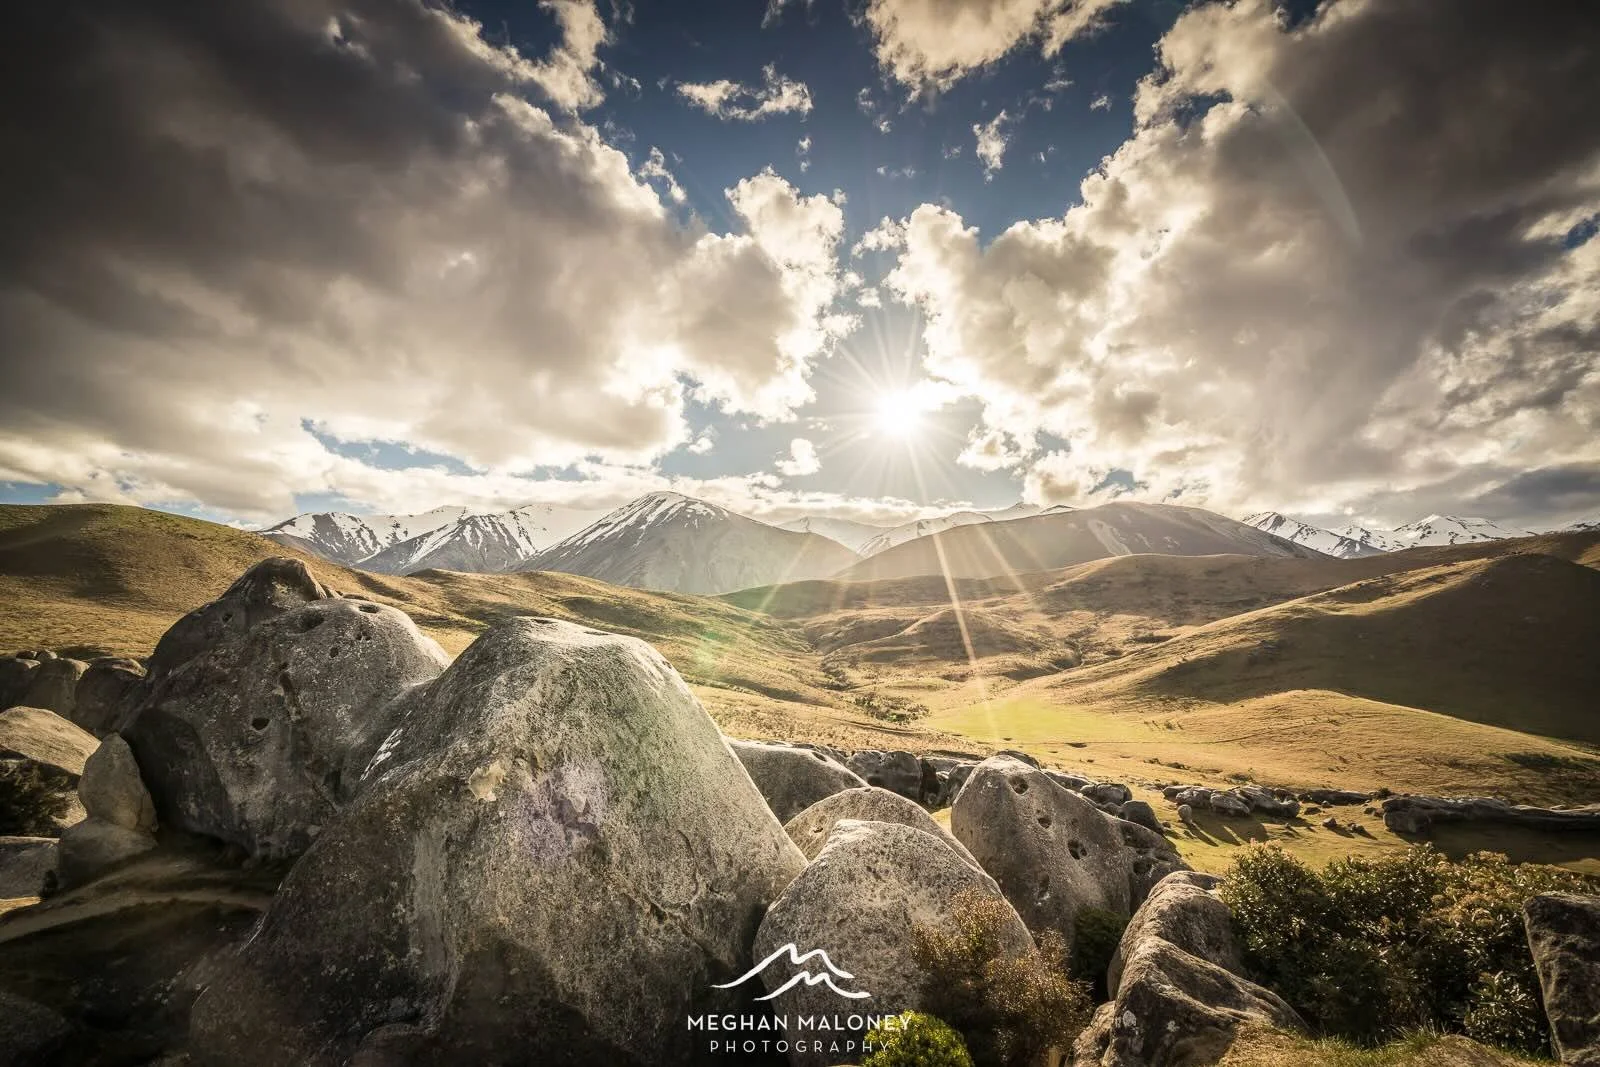
Sony a7R II + 16-35mm f4 @ 16mm (7 aperture blades), 1/250 sec | f/13 | ISO100
3. Find the edge of an object to 'bounce' the light off
The key to achieving a good sunstar is finding an edge for the light to bounce off. It's easy to 'overdo' a sunstar while you are trying to capture one, the trick is to make sure that the sun is partially blocked by an object, like a mountain, tree, or building. This reduces glare and controls the light better, emphasising the sunburst effect.

Sony a7R IV + 24-70mm f4 @ 48mm (7 aperture blades), 1.6 sec | f/22 | ISO100
When you are looking at your camera screen or through your viewfinder, you have to angle yourself so that the sunstar is almost not visible at all, if you do this you'll see on your playback display that the sunstar is actually there. If you can physically see the sunstar through your screen or viewfinder, you'll find the effect is too powerful and it's likely the actual playback image will show very harsh flare.
4. Sunstars in the forest: a low sun angle and keep moving!
Due to the fact the earth is rotating and the sun is moving higher or lower in the sky, you will need to keep moving. Sometimes this means you'll need to move between every single image otherwise the sunstar effect will not be present OR you will have too much flare in the shots. In terms of timing, if you can incorporate a misty winter morning, then you can also achieve interesting shafts of light in the images as well.
Aim to shoot forest shots while the sun is lower in the sky otherwise you won't be able to fit the sun into the frame even when using a wide angle lens in vertical orientation. I normally aim for no later than 1-2 hours after sunrise during autumn and spring, whereas in winter you can shoot all day long as the sun stays lower in the sky, e.g. in the example below the capture time was at midday in midwinter (29 June).

Sony a7R II + 16-35mm f2.8 GM @ 35mm (11 aperture blades), 2 sec | f/22 | ISO100
5. Sunstars in the landscape: be ready for it!
In a wider landscape scene, the best time to shoot a sunstar is while the sun is low during golden hour and sunrise/sunset. Given how quickly the sun moves (either higher or lower) in the sky, you will only get a very small window of time to shoot an image while the sun is in the right position on the edge of the horizon or a mountain, so if a sunstar is your goal then be sure to get yourself into position early with the right settings and then just wait for the right moment to shoot.
Both of the two images below are shot at wider apertures (i.e. f/11-f/14) to create a more diffused, softer look.

Sony a7R II + 16-35mm f2.8 GM @ 16mm, 1.6 sec | f/11 | ISO50

Sony a7R IV + 16-35mm f2.8 GM @ 17mm, 1/5 sec | f/14 | ISO100
However, you can see the contrast of the images above with the image below captured at f/18 - and that the sunstar in this image is much more defined.

Sony a7R IV + 16-35mm f2.8 GM @ 16mm, 1/100 sec | f/18 | ISO250
6. Avoiding flare or use tools to remove in post-processing
It is all too easy to have unwanted flare appear in your sunstar images, but here are some tips for avoiding it.
1. Clean your lens before you begin
Narrower apertures make dust on the lens or sensor appear much more obvious. The cleaner the lens and sensor are before you start, the better.
2. Remove filters if needed
You may have to remove any ND filters or a circular polariser if flare is an obvious problem in your images. Filters can act as a reflector and accentuate the flare and even reflect the lens markings back onto the sensor.
In the image below, you can see that the lens markings are visible on the edge of the image as a result of the filters reflecting the lens writing back onto the sensor.

3. Remove flare in post-processing
Sometimes it may be impossible to avoid flare while you are capturing the perfect angle for your sunstar compositions. Lightroom and Photoshop's Remove tools will do a good job of removing individual flare spots. Here are two shots showing before and after, there are noticeable flare spots coming out to the bottom right of the sun, and also a large flare in the top left corner.

Once applying remove tools, the flare has now been removed and tidied up.

Sony a7R V + 16-35mm f2.8 GM @16mm, 1/15 sec | f/22 | ISO200
7. Consider your composition, timing and lighting wisely
The thought of adding a sunstar to your compositions might be very appealing, but you will also need to carefully consider your composition timing and lighting to create a worthy image. Shooting during golden hour when the sun is lower in the sky will allow you to utilise better foreground lighting, meaning you can include an interesting mix of light and shadows. In the image below, you can see the cherry blossoms have nice under lighting in the blossom, and the ground has both shadows and light reaching out to the corners of the frame.

Sony a7R V + 16-35 f2.8 GM @ 24mm (11 aperture blades), 1/60 sec | f/16 | ISO250

Sony a7R IV + 16-35mm f2.8 GM @ 28mm, 1/50 sec | f/22 | ISO100
In order to shoot at a narrower aperture (which naturally makes the hole in your lens smaller and lets less light in), you'll have to compensate with a longer shutter speed or higher ISO, so this may mean a tripod is required in order to achieve a sharp shot.
In Conclusion
By following these tips, you'll be able to capture the perfect sunstar in a sunlit landscape scene. Sunstars add a compositional element to create extra interest and dimension, allowing you to create dramatic and ultimately more beautiful landscape photography images.